Showing posts with label transmitter. Show all posts

Wednesday, May 11, 2016

40 Meter Receiver (7159kc)

Few days ago a friend asked me about the simple receiver to practise his CW Skills. Well, i have done few experiement with poliakov receiver and they have given a repeatable , proven results. I scanned indian products and could not find any thing for the small kids, new hams or something very basic minimalist, cheap devise. So, I filled in the space. Its better than pixie, tixies, foxx etc but less than well made DC receiver . Brainstorming started, I thought let's re-re-invent the wheel.....
here is the result

This requires minimum of time to make and its up and running within hours. It can be used to practise morse on air. It will certainly not bring the good dx nor it is frequency flexible.

See my previous posts, you will find many experients on this subharmonics receiver. It is still in development stage. You can have dip file from me. Just drop an email. I am making a suitable transmitter. In my mind is two way. One to use this LO and then use the doublers amplifiers to arrive at 40 meter so the hard to find find 7159kc xtal can be avoided and further 3560kc resonator can be used to give flexibility of freq. working on it. Tx might be three stage 3watt, along with relay change over etc.  Another tx will be using 7159kc xtal , class e two stage to arrive at 3watt.

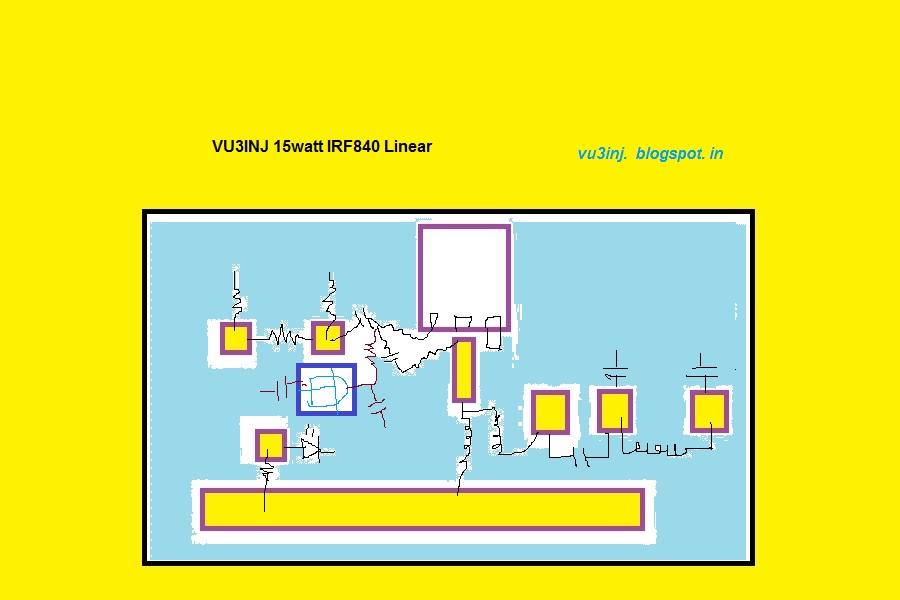
Lets begin::: It all began with this ckt, have a good look. From this all other things are derived. First transistor is an RF amplifier. Two back to back diodes forms the sub-harmonics mixers. Second transistor is AF amplifier. The gain of This AF/RF amp depends on Rc/ Rb. If you find the gain is little low try experimenting with it. 470k/4k7 will give gain of 100.  The choice of transistor will determine the gain as well as noise. The RF transistor should have high ft ( gain bandwith product) that way it will produce good signal. In my experiments I found that bc547c, bc547b gave different gain. 

Small whip antenna works fine. For higher frequency please use some broad band transformer coupled RF amp. That will give good result in 20 meter. At present this ckt is good enough for 40 meter.

The diptrace schematics screen shot.


This is the diptrace pcb making software , This time I took time to make the schematics on this. EArliers I used make by hand and then scan. I realized to make a professional grade pcb, good quality image and parts making the pcb software is a must.
The ckt diagram
List of components
40 METER BAND RECEIVER
# RefDes Value
1 A1 whip antenna
2 C1
3 C2 100p
4 C3 100n
5 C4
6 C5 100n
7 C6 10 mfd
8 C7 10 mfd
9 C8 100p
10 C9 100p
11 C10 100p
12 C11 100n
13 C12 100  mfd
14 C13 1000 mfd
15 C14 33p
16 C15 10 mfd
17 C16
18 C17 100 mfd
19 C18 100 mfd
20 C19
21 C21 100n
22 D1 green LED
23 D2 1n4148
24 D3 1n4148
25 D4 1n4007
26 J1  speaker out put JACKPIN
27 J2 dc input JACKPIN
28 L2
29 L3 
34 Q1 BC549C rf AMP
35 Q2 BC547B af amp
36 Q3 BC547B Oscillator
37 R1 470k
38 R2 4k7
39 R3 470 ohm
40 R4 2K2
41 R5 120k
42 R6 2k2
43 R7 100 ohm
44 R8 120k
45 R9 2k7
46 R10 100 ohm
47 R11 47k
48 R12 470
49 R13 10 ohm
50 R14
51 T1
52 T2
53 U1 7805
54 U3 1/2 TDA2822m
55 Y1 3579kc
56 Y2 3579kc

Note of TDA2822m,

I always used LM386 but somehow I am finding difficult to get a good chip. All Chinese chips are faulty. So, tried TDA2822m  an 8 pin DIP ic. It is good one. It contains two amplifiers. This IC is a low voltage, low power  AF amp. So, use 4 to 5 volt maximum. When used with 12volt supply it starts heating up To reduce heating on IC, I used a ballast resistor of 200 ohm ( 100 ohm 2watt + 100 ohm 2watt) , so it stopped heating up. Remember this thing.  Only one part out of two is used.

Note on Antenna.

For making pcb from schematics , I put a two tank band pass filter, otherwise single tank with whip antenna is sufficient for all purpose.

Note on the Xtal Oscialltor- 3579kc

we need very small Rf injection to the diodes so single transitor osc is used. There is shown two coils and two xtals. I put it there only reason if someone wants to modify experiment , the same pcb will be useful. F6GQB. So, I can get 60k shift , more than enough for this set-up.  Except this two square I have not hidden anything. Only this squares have few extra empty parts.  Only single xtal is used, No RFC used.

If anything is missing please let me know.
You can make it, but remember its still in development stage. When I first put it on facebook there was two errors. one transistor part was wrongly labeled. And 12 volt and 5volt lines mixed up at 2822m. So, ckt on this blog should be final.

THE RECEIVER CKT IS FINAL. there will be no modifications. but revision of write-up , addendum will be added later on.

Input Band Pass Filter modifications. As of 17 may 2016 Modified the input filter system. Put fixed inductor 2.2 micro hentry with 215 pf =( 100p || 100p) + 180pf , tap taken from junction of both 100pf. The RFC of 2.2 micro henry can be used ready made or  made one 9 to 10 milli-meter dia plastic tube, I used felt pen, 30swg around 22 to 24 turns close wound, length will be 10 to 12 milli-meter.  Measure it with LC meter.  Plastic tubing former was around 3 cm long.  Will upload close-up fotos soon.

Receiver sounds good. Housed in the home made box. Other modifications like painting, putting nut-bolts that will happen as per need but electrical ckt is finale.  Am breakthrough is very minimal. AF filter might be a good idea. But the simplicity beats all. Make this receiver and please wait for compatible transmitter.


BPF
so, till then enjoy, the wheel has been re-re-invented, take a ride.
de vu3inj.
 here is a link to my youtube chanel. on similar design made the 20 meter one. have a look at https://www.youtube.com/watch?v=G4LTTf-waVc please
NB;- you may write down few words please.

Friday, July 31, 2015

15Watt Linear

Here is the schematics and PCB pattern for my 15watt linear.

15watt linear component placement

15watt linear pad placement


Descriptions, History :-

I had made this linear by accident. My 5watt cw tx/ DSB tx was not giving me signal reports. I was worried ! What is the  problem ? Then it occurred  to make a single device linear . One ckt was interesting . Put queries in the Indian Homebrewers forum at Facebook. And lots of reply came. VU2RON, VU2ESE, VU2DEV and lots more friend jumped in.

Finally tried it with IRF510 but it went burst with 25volt dc power supply. Then changed the IRF840/IRF640. Both worked fine. vu2ese had suggested me to put some 200pf at the drain. VU2DEV suggested making a Pi-LC matching. He even pointed out the calculations in the ARRL handbook , which he had gifted me. But, I settled for transformer & toroids. Ron hinted on impedance transformation of this broad band transformer.

Then made it. I used Small pig nose baluns bought from tpsonline Bhopal. Put 6 togather. 3x2, Glued with water pipe glue and it worked. It did not heat-up. The biggest problem with the ferrite is that it heats up and freq response depending on the size and material. So, we have to take care of this problem.

I used in the input a resistive 3db pad. This db-pad solved my problem for loading the exciter, proper match etc. It was happy happy solutions. With pad some fraction of input power is wasted in heat. Its okey.

I put LED to indicate power supply presence. I put a protective diode 1N4007. Not shown here. The VCC line is a big one.  Instead of deriving 12volt from the pcb I used the LM7805 voltage regulator. The simple preset is used on the pcb to bias the gate of IRF. At gate a small value resistor 5 ohm is used to stop parasitics. If you have ferrite bead please use that also. Now, a days we don't find ferrite bead esily.

Filter is classic bilateral 50 ohm three pole. Simplicity. Actually 7 pole filter should be used for more spectral purity.

The relays for changing over the antenna etc are not used here as it was meant to be a beacon / CW tx.

Components & Schematics:-


vu3inj linear


Setting up the linear:-

this requires some care & instruments.
Put Digital Multimeter into 10A range. Set the current to about 100mili amp. Now key the exciter. Make sure there is RF. This will increase the linear current to about 1.2 Amp. Use the dummy load or dipole antenna. VU2PTR digital VSWR meter will indicate the 15watt. So, this is the set-up. Nothing more. Mind you the preset tuning is little trickey. Slight increase in the bias and power jumps from 5 watt to 15watt. At one point of time you will feel that heatsink is too much hot but there is no power increase. buck down a little... don't set it for constant 1 amp. at max 300ma is also good. Do little experiments but just care for heat....

This linear has been never tested on SSB. If I ever do, will let you know.My approach was use whatever is on hand. Till date I have made two linears and both work wonderfully. One is with me and one is with VU2TOO.

Heat sink:-

It is one of the most important factor in this linear. You ought to use a biggest heatsink you can find. Old CPU heasink is okey. I also use the fan.

On Air test:-
On one two occasion I asked for listening service from VU3INK now (VU2JYX ), VU2DEV and two more hams. I am thankful to you Kishore for being with me. My signal was good. consistently 55 to 57. In this I had not tuned my antenna at all. SWR was around 2.5, So, the signal reports are not bad.

Will update few more fotos of linears and corrections within two days.


That's it folks the wheel has been re-invented.

Use it and don't forget to customize the bells and whistles ( relays, heatsink , box etc)


Sunday, April 6, 2014

20 meter transmitter
The QRP transmitter.

 I was seeing through my old copy of the EFY. Found this. In year 96-y2k, Pradeep.G,   D.Prabhakaran,    vu3nsh etc had published very good work.

I have not made this. But made two tx on 80 meter using little different design and they had worked. All parts are easily available and can be substituted with others. It is a very straight forward transmitter.

If transistor SL100 is not available try 2n2219. Use crown heatsink.

Instead of BD139 try C1162 transistors with heatsink. Any metal slab with 5 cm by 5cm and 2 to 5mm thickness should work. Or try any heatsink you have. You can also try to use the cabinet chasis as heatsink but do care to use the mica washer (but dont use this last option). If you are feeling that transistor is making too much heat try a small fan, computer fan. Now a days computer fans cost very less !. Put it above the heatsink directly throwing air on it. fasten the fan tightly so it dont wobble the chasis or the ckt. Do, power the fan seperately as it requires 210ma ,12v dc.

Seperation of PA and other stage is not marked by dotten line, but i suggest to make the PA in different board, if using the general purpose pcb . Please also enclose the oscillator stage in a small aluminium box for xtra stabilty.

Minimum component and QRP does not mean we dont give it a big box. Of course ! cost will increase, but the metal box enhances the quality of your projects. In the end you will like the result.

May be we can switch the oscillator and buffer stage by a transistor switch. Try SK100, BD140 OR 2n3054 (?)  or a relay if its chattering is not annoying to you.

I see one further developement that we can modulelate the pa stage to make AM Transmitter for local use. It is worth a try.

JF01 ? getting old so forgetting his name also made three transistor 40 meter transmitter. Xtal is important. We will find this 14.318 xtal for some more years. its very cheap 10/-rs per piece. Dont try to port it for other band, you will end up frustrated. Use it as it is.

If i make then, will be sure to upload with my own version. But one last tip. Try one stage at a time. First make oscillator, then make the second stage use it. tweak it. box it. now make the cabinet put everything, fan etc and make the thrid stage. Some sort of atu and relay to switch ON off and QSK is needed. If some seniour hams with antenna analyzer makes some antenna then it will be our standard rig for lots of hams. By, the way 14.318kc xtal freq is very less populated so THE QRP ham can survive there. thanks enjoy de vu3inj

06april2014
please search the jf10zl.html and you will get lots of information regarding homebrew project using simple transistors and they work nice.

14318kc cw transmitter
 This is my hand drawing.
 This is how i put fan on the box , above the power transistor.

For the AM Modifications please search the pirate radio transmitter, they have excellent modulations method i.e heising modulations. Here a choke is used. Now a days there is no audio choke available, best ways is to wind yourself or order speciallly to local transformer manufecturer. You have to provide the data.

Another method is to use 12-0-12, 1Amp power transformers secondary. It work. There you will also need an audio amplifier.

I hope to make this one for  am local use .

In this project please look the blog from time to time. I will not disappoint you FRIENDS.....

Thursday, March 6, 2014

Homebrew RF Power Amplifier

Thank god i have reached to this point after having the real linear amplifier.

I am going to edit and re-edit this page for sometime till i make a linear myself.


vu2ptr_linear
At present trying to use the linear made by vu2ptr to increase my ham radio life and to be on air urgently.

Later on i will make another linear  of this or any other design (push-pull or single ended FET)  and put the process here. ,

If anyone wants to buy ready made linear or its pcb, toroids etc please do contact vu2ptr directly. He also makes vswr meter, lc meter , frequency counter etc.


Making linear:-

RF amplifier design:-
Now, organizing the available info for use. It becomes very hard to choose from, but generally all are derivative of the wa2eby irf 510 push pull linear amp design.

Toroids, FETs & other things.

On hardware front I have toroids, irf840,irf510, power supplies, dummy loads so that is not the issue.

But will take time to first pack my existing things and put into the boxes. thats priority...........

The single ended linear:-
Most probably i will start building the singe ended IRF510 based linear. It will same as the done before but with more power and more current and proper toroids. I think air core toroids does not drive the other stages properly due to some reasons. Don't use the air-core toroids in the power amplifier. simple ferrite cores (slugs) can be used upto the 1watt.

when in doubt where we turn for help ? THE ORIGINAL OEM

HERE IS WHAT vu2RM HAS TO SAY. (My- copy- cut- paste- tech)

PUSH-PULL AMPLIFIER FOR 14 MHz
By: S. Rama Mohan Rao, VU2RM

    After working many years on my RM-96 with IRF830...etc. in the final PA, I have tried the same tried the same circuit for 14 MHz transceiver. The same broad band is used with IRF830. It has given an output of 4watts or so. Then, I have gone deep into the subject of VMOS & TMOS power FET's. I have decided to use these devices with Low CISS & COSS (input & output capacitance) values. I have finally chosen to use IRF510 devices. This has a maximum Voltage (VDS) of 110 V.

I have built a push-pull stage because of the following reasons:

*      When a tuned circuit is used in the final tank circuit with a single stage amplifier, the quality of the signal sounds good.
  *
      Nevertheless, with a single stage broad band it is not the same quality.
*

      I felt that this difference is due to the flywheel effect of the tuned circuit.
    *

      During the technical discussions with some of the home brewers, it is learnt that the)/also found the same when the wave shape was seen on the oscilloscope.
    *

      The positive and the negative half cycles are not the same
    *

      Therefore, I have decided to make a push-pull amplifier.
    *

      Also for the reason that as we are using broad band amplifier, there are bound to be some harmonic generations, due core saturation of the final toroid and various reasons.
    *

      In push-pull these can be avoided largely and therefore less spurious outputs and better quality.
    *

      Keeping in view al/these points the following circuit is evolved and it is working satisfactorily. 

Experimentation made on this circuit:

    After building this circuit, I found, one IRF is getting hotter than the other. I made all checks I know, but it is observed that one gate is getting more voltage than the other. Then I reversed the secondary windings. Now, the other gets more heated. So evidently, IRF has nothing to do with this unequal drive voltages to the gate. I tried it with an imported toroid. No luck got fed up and thought of introducing negative feedback to equalizes the gain of each FET. So, tried combination of RC network, which is a general practice. About 100 Kilo ohms in series with 150pf capacitance from drain to gate. Now both the positive hail cycles and negative half cycles are equaled and the defect of one FET getting hotter than the other vanished. The quality also improved. Even I operated for one or two hours the heat sink is not getting heated up. i am using 22 Volts supply on the drain and it draws about 2 Amps. (i.e. 44 watt DC input). It is giving a power output of 25 watts into a 50 ohms antenna as measured on a Daiwa power/SWR meter. Further, there is no reflected power from the PA stage. So, RF filters are not used.

    I have not built a 21 MHz RM-96, but looking at CISS value of IRF510, I have a strong belief that it can work on 21 MHz also. So this will be a good choice for 7/14/21 MHz power amplifier. When one Ham from North India told me that he is using IRF840 in 14 MHz and is getting about 20 watts output, I immediately got hold of IRF840 and replaced the IRF510 with IRF840. The power output is just 4 watts. I have increased the voltage from 22 V to 40 V, the output power went upto 10 watts. However, the heat sink is getting hot indicating that the efficiency is Low. Therefore, I left the PA like that, settling with IRF510 only. Happy, go lucky, now that is all my experimentation on the push-pull power amplifier.